3D Laser Scanning and 3D Printing
Activities
3D laser scanning and stereolithographic building
Researchers from Stanford University have used laser rangefinders to scan the surface of famous sculptures, such as Michelangelo’s David, and create high resolution digital models. (Levoy, 2003.) This is done using a carefully calibrated laser which takes detailed measurements of the location of points in one horizontal slice after another, capturing a radiographer’s outline at each stage. (See Figure A)
As we might expect by now, this slicing process can be reversed. Using the digital models, builders can recreate actual three-dimensional replicas. Important not only to artists and historians, this process is critical in medical, manufacturing, moviemaking, and video game industries. Many different kinds of precision machining tools can be used to make these replicas.
One example is called stereolithography. It is the most widely used rapid prototyping technology. It uses digital models created by CAD programs (e.g. Google SketchUp) to drive a laser which solidifies a two dimensional cross section out of liquid plastic. Once a layer is complete, a platform holding the model drops by the specified layer thickness and the next layer is built. Fine layer by fine layer, the machine proceeds – just like our builders – until a complete 3D model is produced. Tremendous examples of mathematical objects that have been created using stereolithography are the models of George Hart (Chief of Content at the soon-opening Museum of Mathematics in Manhattan) which can be seen at http://www.georgehart.com/rp/rp.html .
3D Laser Scanning Activities:
In small groups, choose a modestly complicated but reasonably sized solid object to scan.
-
1. On a sheet of paper, draw a straight line whose length is the width of the solid and is divided into a dozen equally spaced intervals.
-
2.Set the object on the paper so it does not obscure the axis drawn in 1).
-
3.Set a laser level to horizontal and position it in front of the solid. The laser now provides the boundary of a cross sectional slice.
-
4.As shown in Figure A, have one group member align a ruler perpendicular to the axis with its tip touching the object where the laser meets it. Have another group member measure the distance from the axis to the solid.
5. When all measurements are taken, the students should use these to make a cross section much as they did with the topographical profiles above.
3D Profile Gauge Activities:
-
1. Alternatively, each group should use carpenter’s profile gauges to quickly copy the boundary of different cross sections of the solid.
-
2. Taking horizontal and vertical cross sections at regular intervals, it is fairly easy to make precise cross sections to build a sliceform such as the human face in Figure B.
3D Laser Building/Printing Activities:
Find an interesting contour map (available in Gazetteers in your library) that has a range of at least 20 contour lines separating the highest and lowest elevation.
-
1. Prominently mark two points on a copy of the map: the highest elevation and another point a significant distance away, choosing a point of highest local elevation if possible.
-
2.Make as many copies of the marked map as there are contour lines.
-
3.Each class member is responsible for a specific contour line. Cut along this contour to obtain a horizontal cross section of the region’s topography.
-
4.Affix or trace the outline of each cross section to a piece of ¼” foam-core or double thickness of corrugated cardboard. Then cut out each cross section, carefully labeling it, and poking two holes at the marked locations of the map.
-
5.Beginning with the lowest elevation cross section, successively stack up the cross sections, using pencils or short pieces of dowel to thread through the holes to keep the cross sections aligned.
Your completed object is a raised relief map of the region constructed in much the same way stereolithography makes prototypes.
Connection: 3D Sculpture Puzzle
The image of Mount Rushmore below is a photograph of a completed “3D Sculpture Puzzle.” This particular puzzle is made up of 186 pieces. From Milton Bradley, these puzzles are still available in a range of designs, including: The Eternal Woman, American Bald Eagle, Sweet Cherubs, King Tut, The Masks of Comedy and Tragedy, and even Elvis Presley.
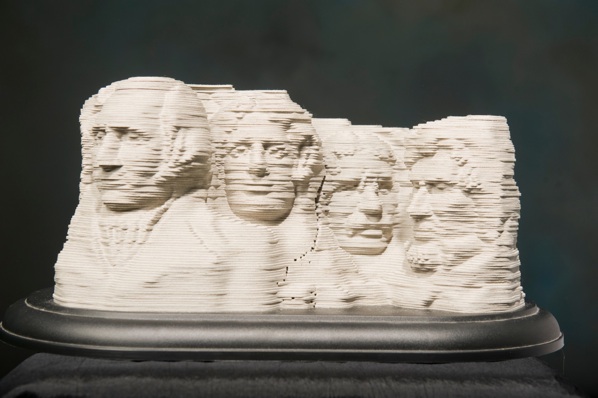
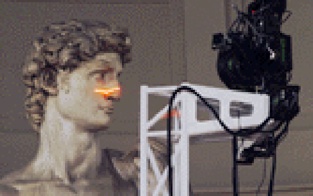
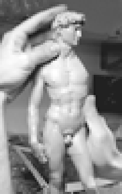
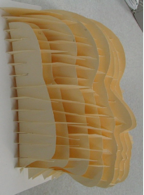
Figure A: Scanning Michelangelo and one of the resulting replicas, from the Digital Michelangelo Project at Stanford University.
Figure B: Sliceform of a Face
Lydia Lucia, Westfield State University.
Copyright 2011 Julian Fleron and Volker Ecke.