Blueprints and Computer Aided Design
Activities
Blueprints
Like contour maps, traditional blue-prints, representing an amalgamation of information from slices of the object along major directions. A builder synthesizes the information from such a collection of two-dimensional prints to create a fully-featured three-dimensional object, be it a porch, a roof, or an entire house. These are the builders of the Flatland game in real life.
Blueprint Activities:
Hand out a set of blue-prints for a small building project, such as a porch or a gazebo, without identifying the project.
1.What is this? What information can you read off the blueprint?
2.Build a model using manila envelopes and tape. It is easiest if your model is the same size as the blue-print.
Computer Aided Design (CAD)
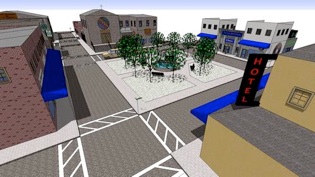
Architects, designers, and engineers routinely use Computer Aided Design (CAD) software to flexibly navigate the dimensional ladder. With this software customers can take a virtual walk through designs of their new house, the architect can explore how the lighting inside the building might change in the course of the day, and a builder can determine the total amount of materials needed.
Google SketchUp is a freely available CAD tool we can use with our students to create, view, and modify three-dimensional designs ourselves (http://sketchup.google.com/). It is sophisticated enough to create realistic models of houses. It was designed to allow users to provide a three-dimensional rendering of their house for inclusion in Google Earth.
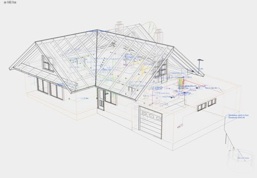
Basic SketchUp operations lift us from two into three dimensions: draw a two-dimensional figure (such as a circle, a rectangle, or a polygon) and push or pull it into the third dimension (creating a cylinder from a circle, for example). We can also step down the dimension ladder: placing a “section plane” into our design will cut it open and reveal a particular cross-section; moving the plane will reveal a radiographer’s movie. We can produce x-ray views by making surfaces opaque; shadows provide realistic views. We can capture a particular fly-through as a slide show. (For more information on using Goggle SketchUp in mathematics classrooms, see “Modeling and Exploring 3D Worlds Using Google SketchUp” by Fleron and Livingstone at http://www.westfield.ma.edu/GSUMathematics/ ).
SketchUp Activities:
1.SketchUp Introduction: A short series of self-paced tutorials included in SketchUp can be used to introduce the students to the basic tools (Intro tutorial) and guide them through the basic steps in creating a simple house (three short tutorials called Start A Drawing, downloaded through the Help menu).
2.SketchUp Building: Open SketchUp and create a closed, planar shape using Rectangle, Circle, or Polygon. Select this shape and then activate the Push/Pull tool. You have created a right prism. Every horizontal cross section of this solid is congruent. In other words, if it passed vertically through Flatland a Flatlander would not see the shape changing at all.
3.SketchUp Shaping: Create another right prism as in (1). Choose the Rotate tool and rotate the top surface of the prism. Choose the Orbit tool to closely inspect the object you created. What would a Flatlander observe? Experiment with rotating by different angles.
4.SketchUp Radiography: Create a solid in SketchUp, as in (1) or using GetModel to get a more sophisticated model such as the Statue of Liberty from the Internet. Activate Section Plane and create a section plane. Select this plane, activate Move, and then move the section plane by clicking and dragging on the plane. As this plane moves you will see it create cross sections of your SketchUp solid.
Source: Google Sketchup, Construction
Copyright 2011 Julian Fleron and Volker Ecke.